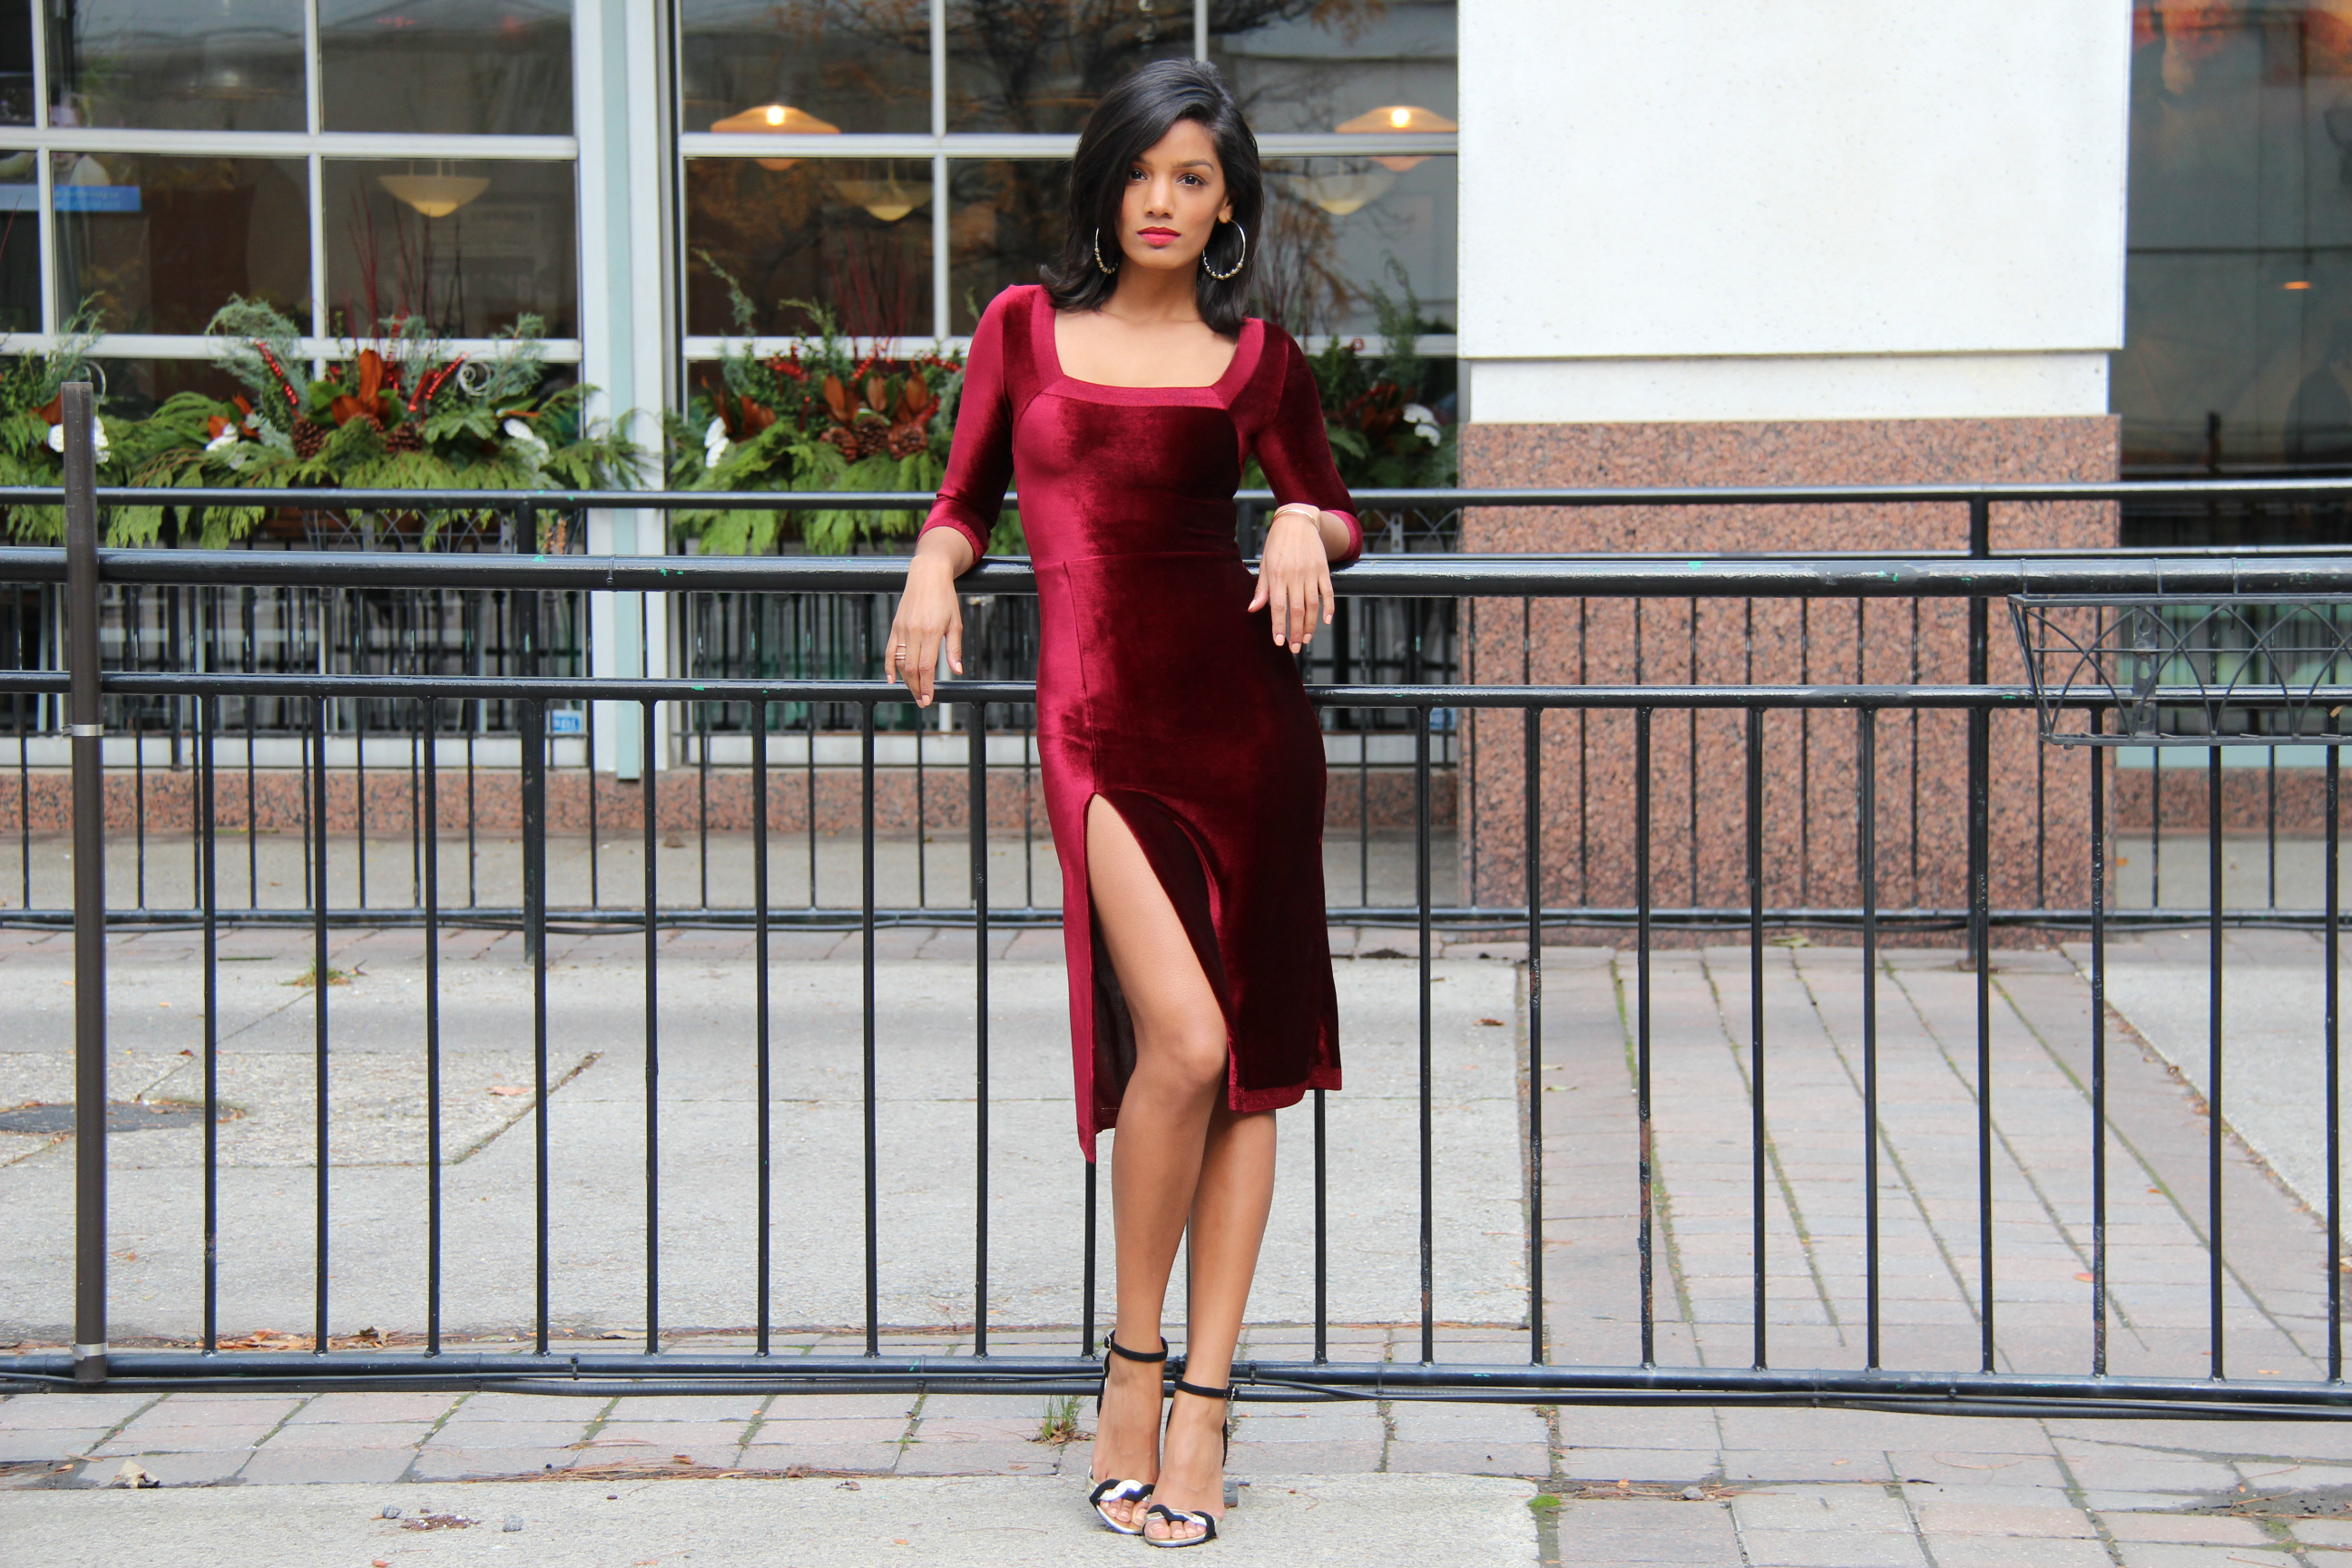
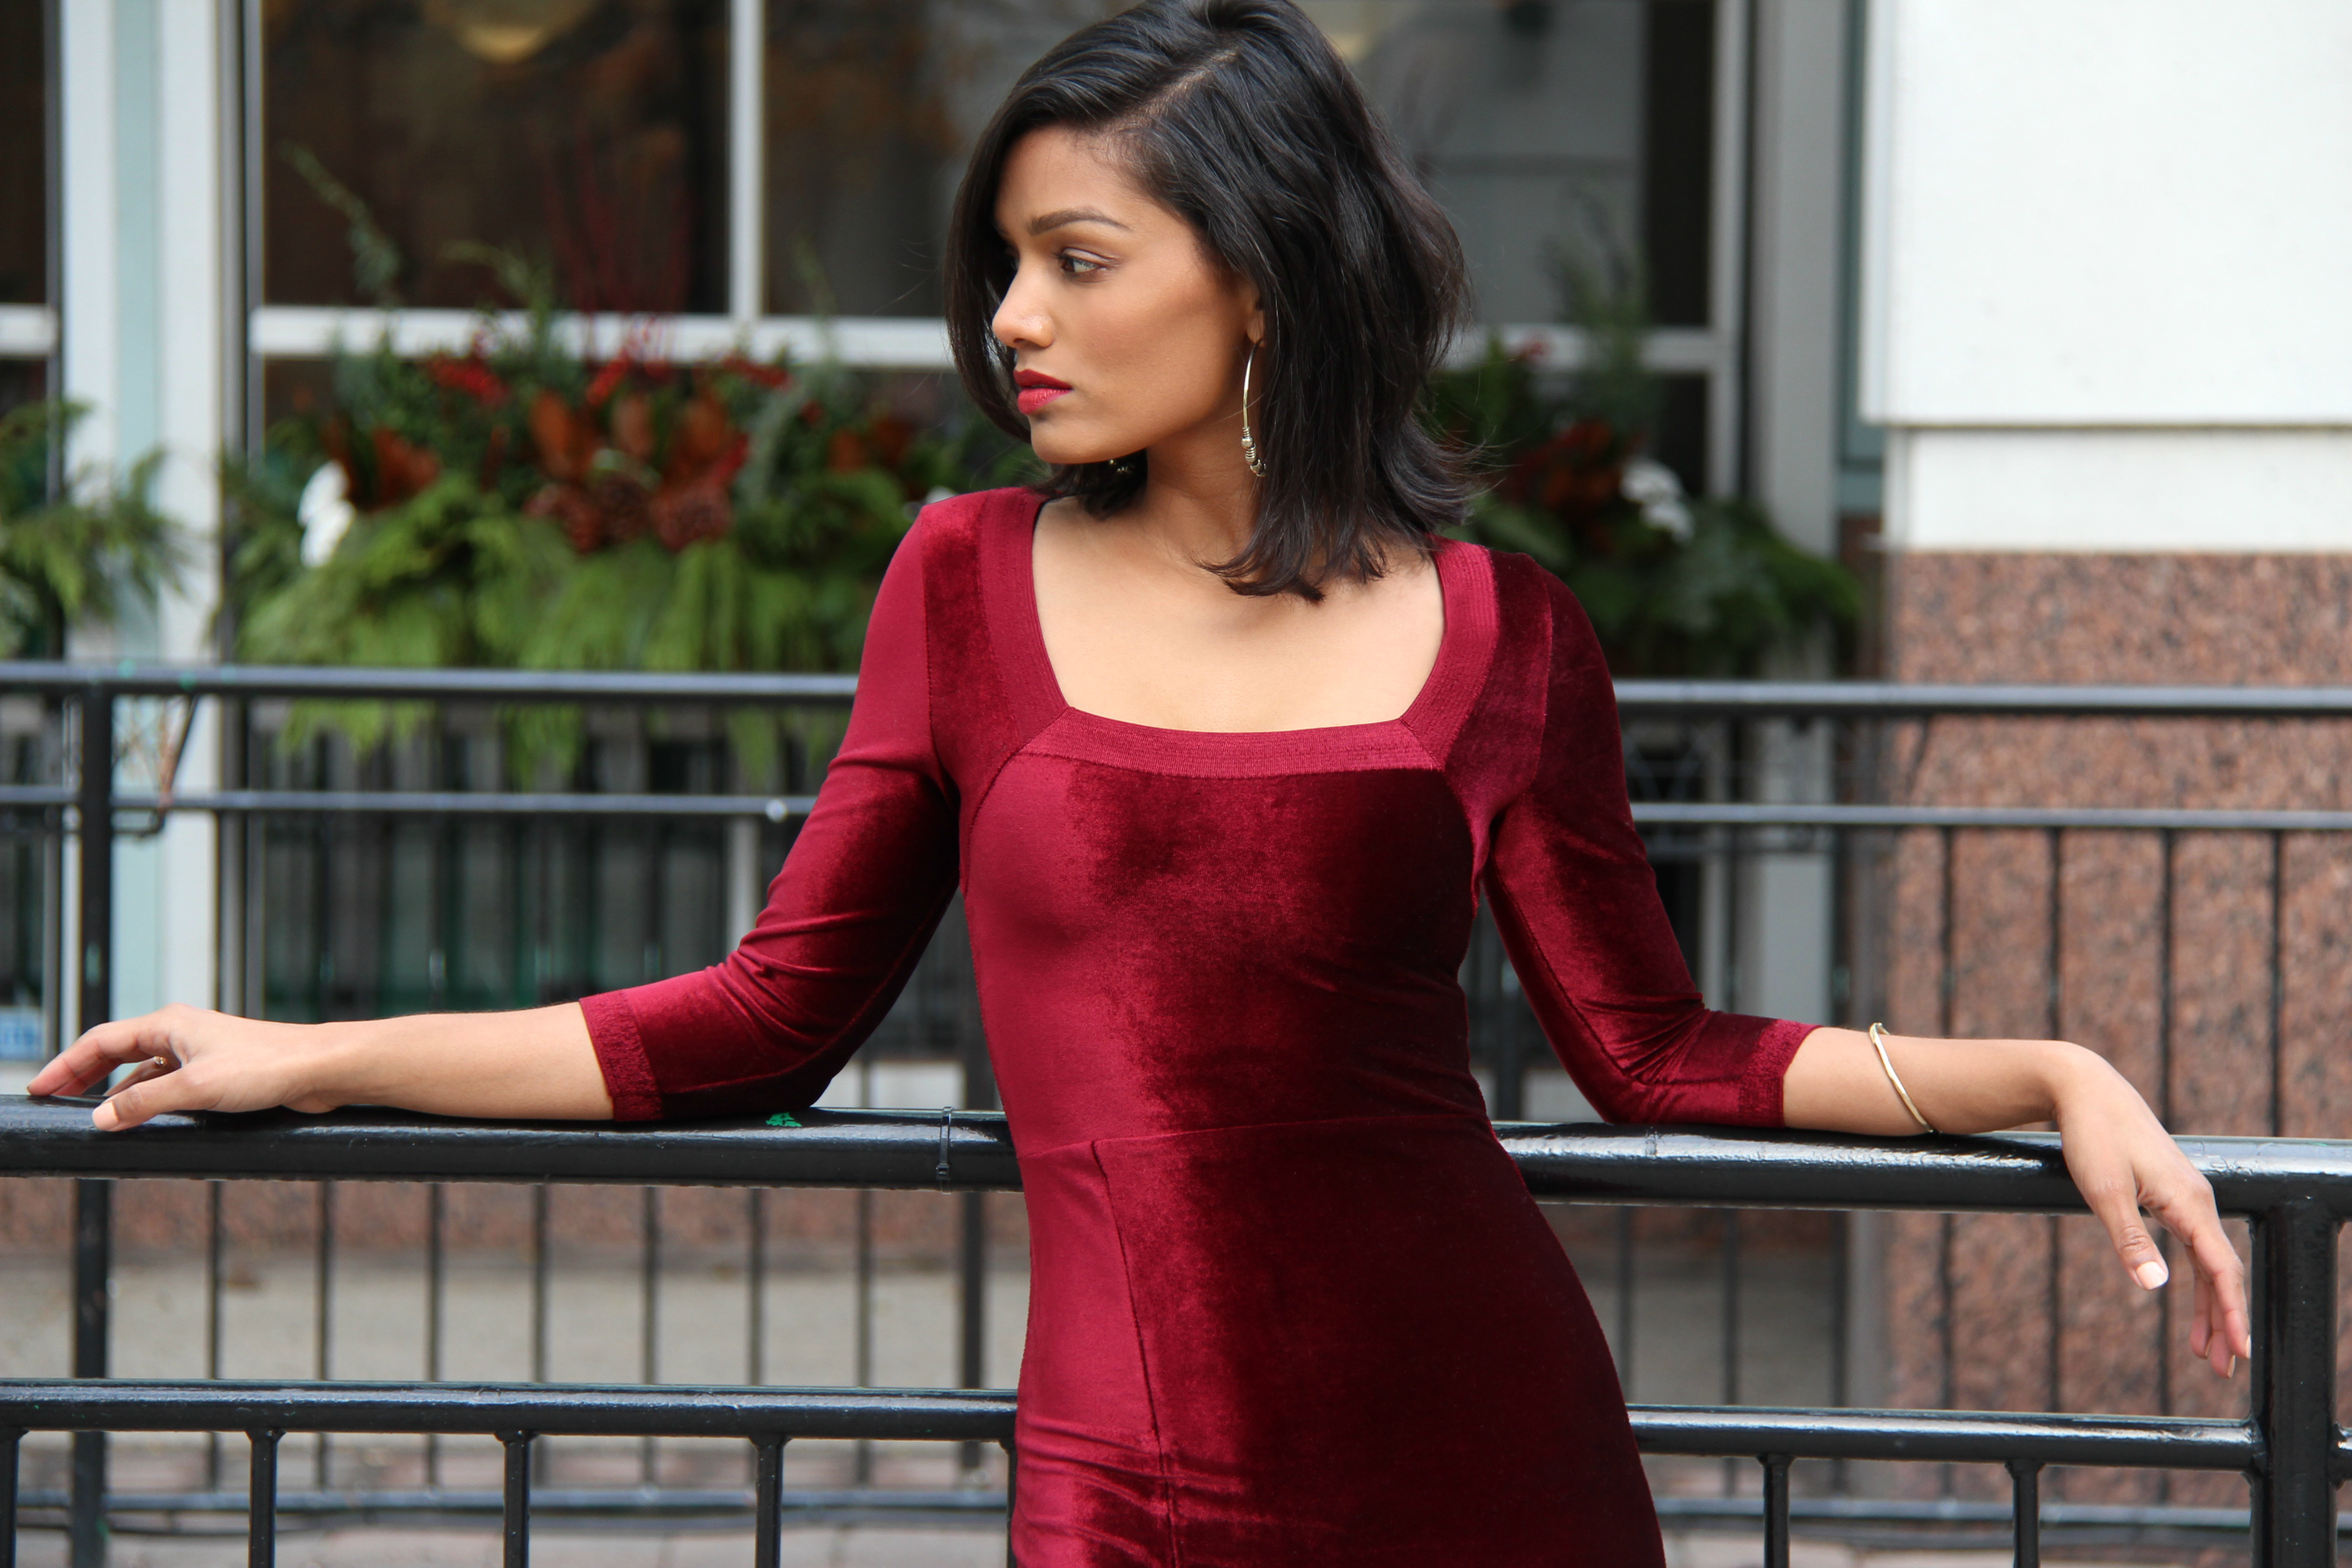
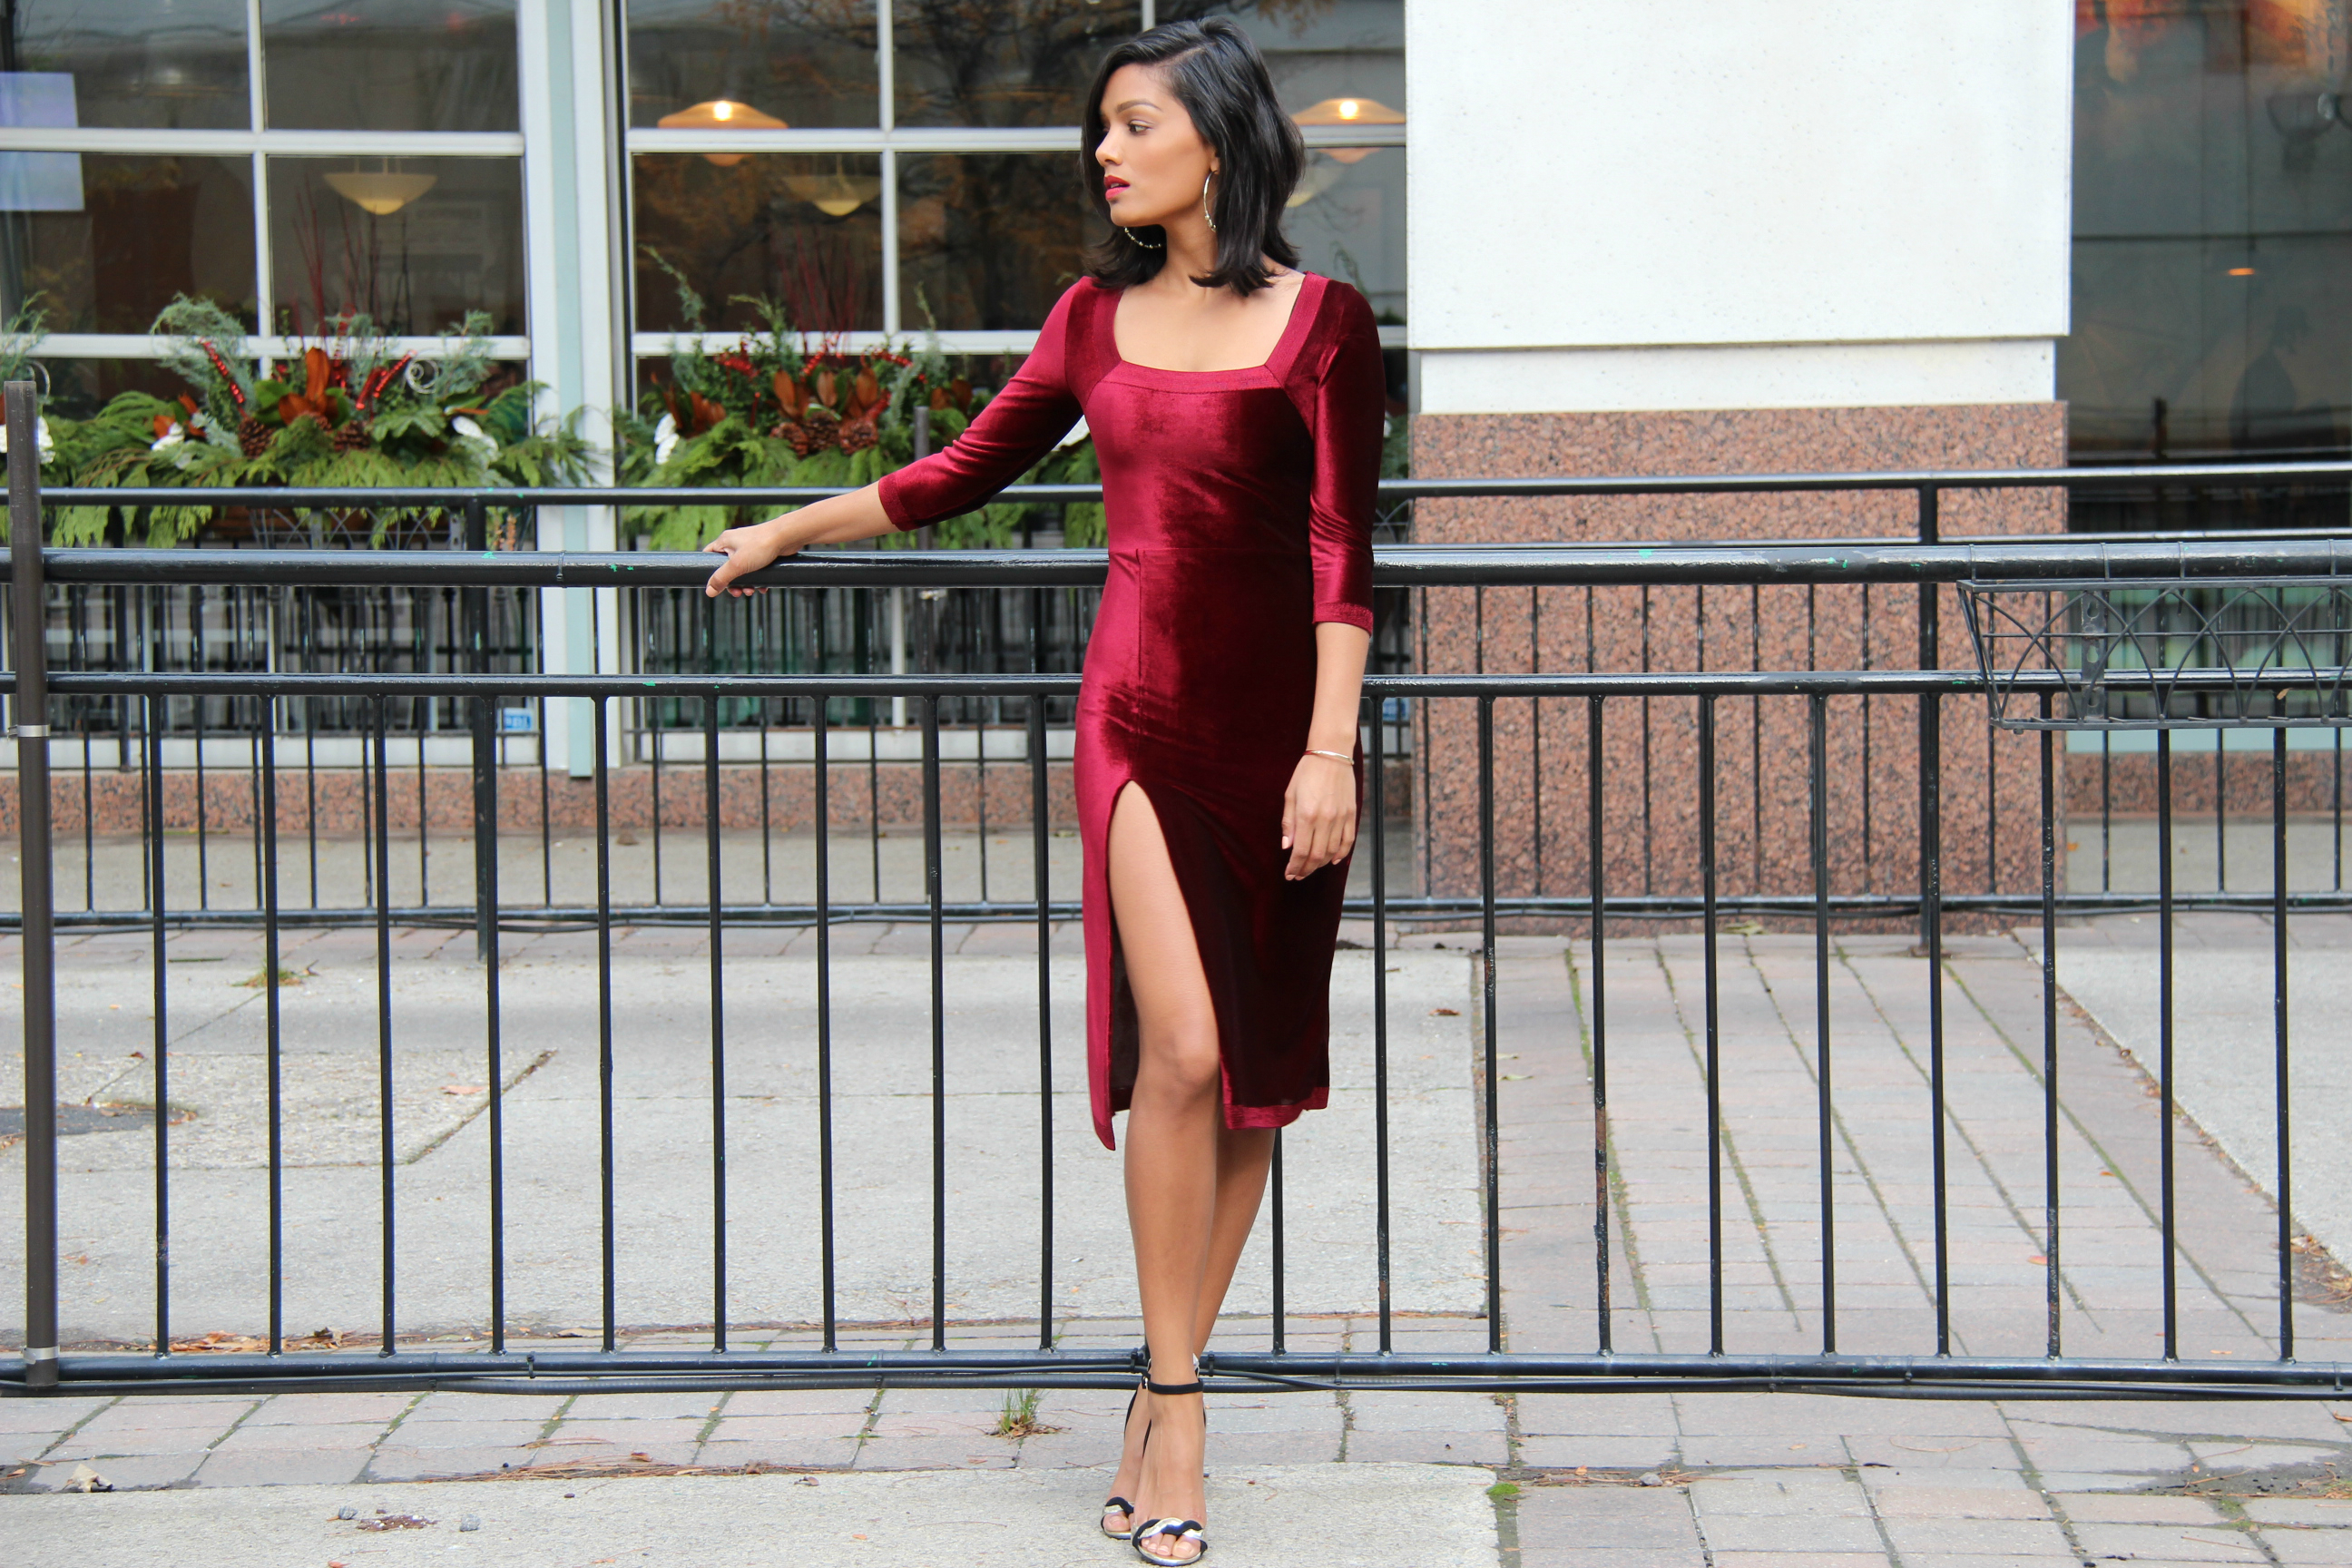
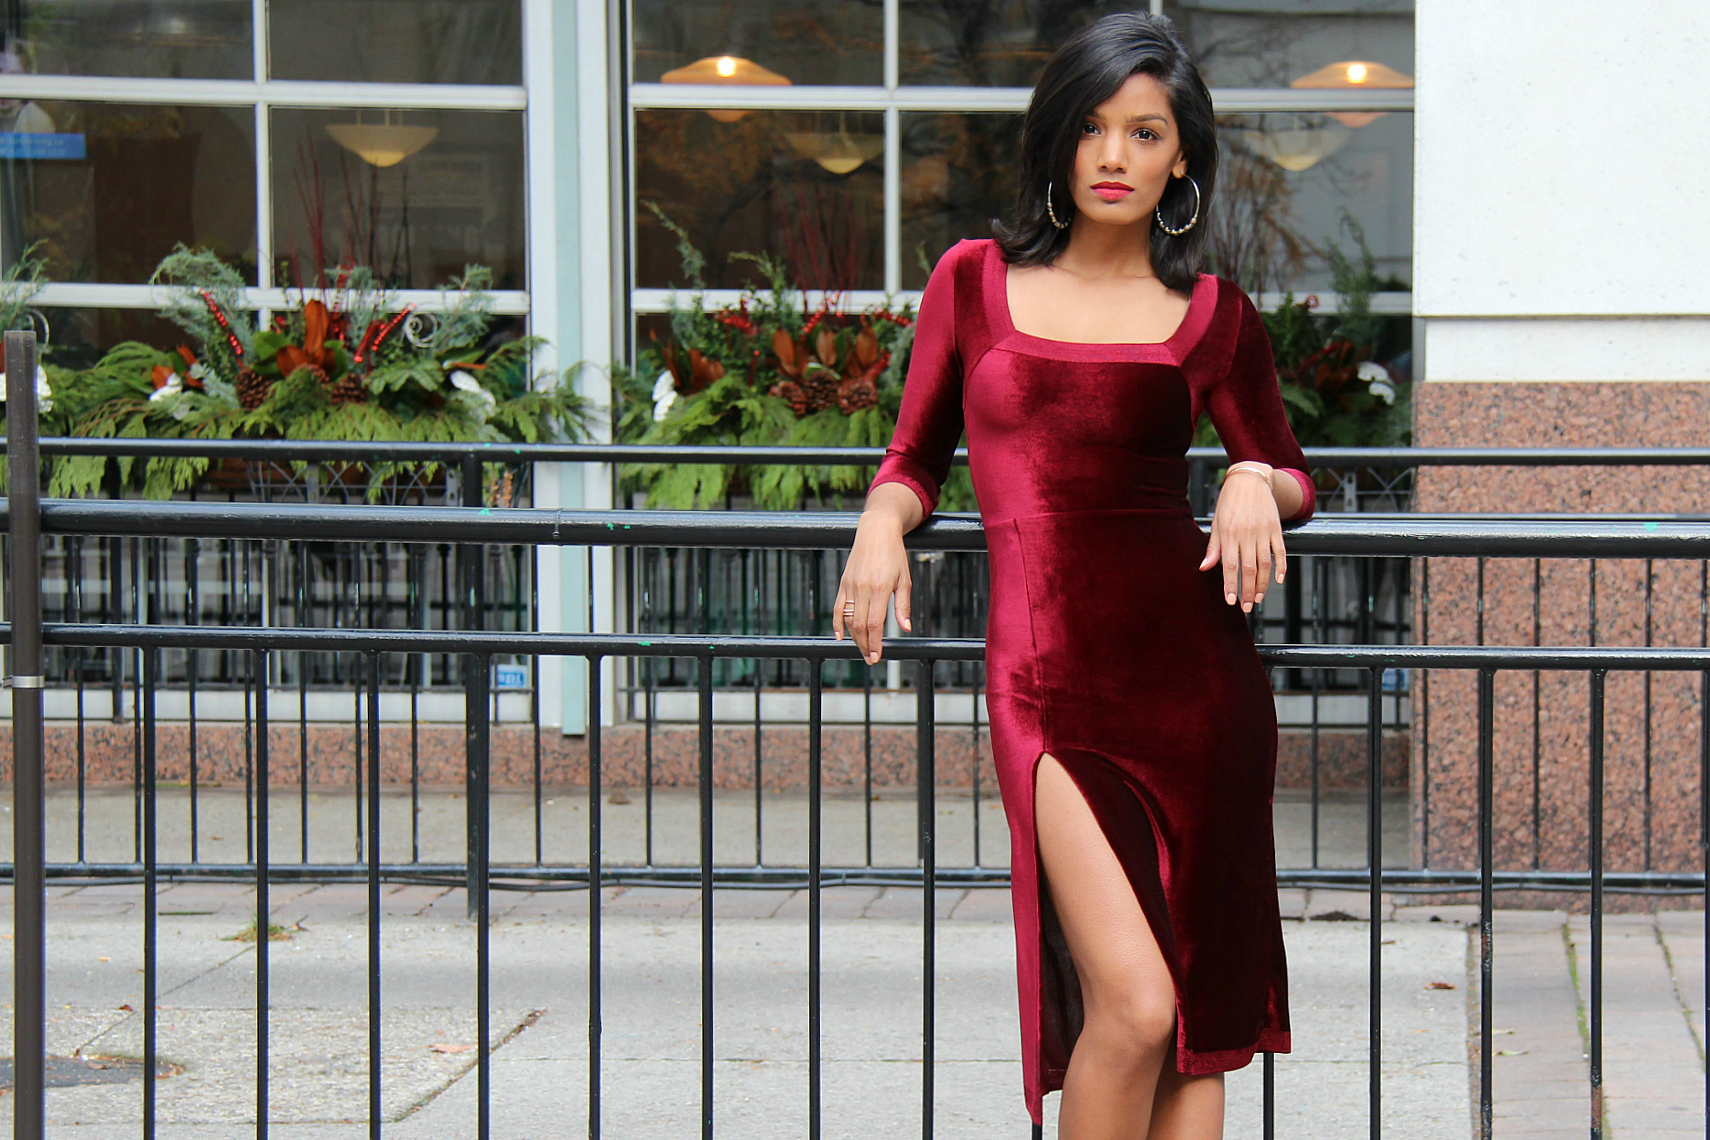
December is upon is us, the holidays are near and velvet is back! I’m excited to share this festive-looking DIY red velvet holiday dress because it was somewhat of an experiment with a new design and new fabric, and it turned out exactly how I wanted it to!
So here’s what happened…
I had a party to go to last weekend where all the girls had to wear red. I had just finished making my purple oversized coat and wanted a break from sewing, so I had every intention of buying a dress. The hunt was on…I spent hours looking for something and saw nothing I liked, except for one dress that was $138. But when I turned it inside out, all the threads were loose and hanging out. Nope, not spending a dollar on that! Then I saw a photo of a stunning dress at Marciano – it was dark red velvet, had a high slit and was strapless…and of course, they didn’t have it in stores. Bah, I was so over my shopping experience so I decided to use this dress from Marciano as my inspiration!
Bah, I was so over my shopping experience…
*Ahem, this is where I redirect you to the perks of sewing 😀
Material
I went on a quest to find a nice red stretch velvet and ended up at a store called Fabric by Designers on Queen St. West in Toronto. Unless you’re looking for it, you would probably never find it because the door is hidden and the store itself is underground, but what a gem this shop is! My eyes found this fabric almost immediately and the girl there was super helpful. She initially told me the fabric was $15/m, but realized it was actually $25/m right as she was about to cut it. I was willing to pay (especially since I considered buying that dress for $138), but she honoured what she initially said and insisted I pay $15/m. Oh, how I love good service…!
The Design
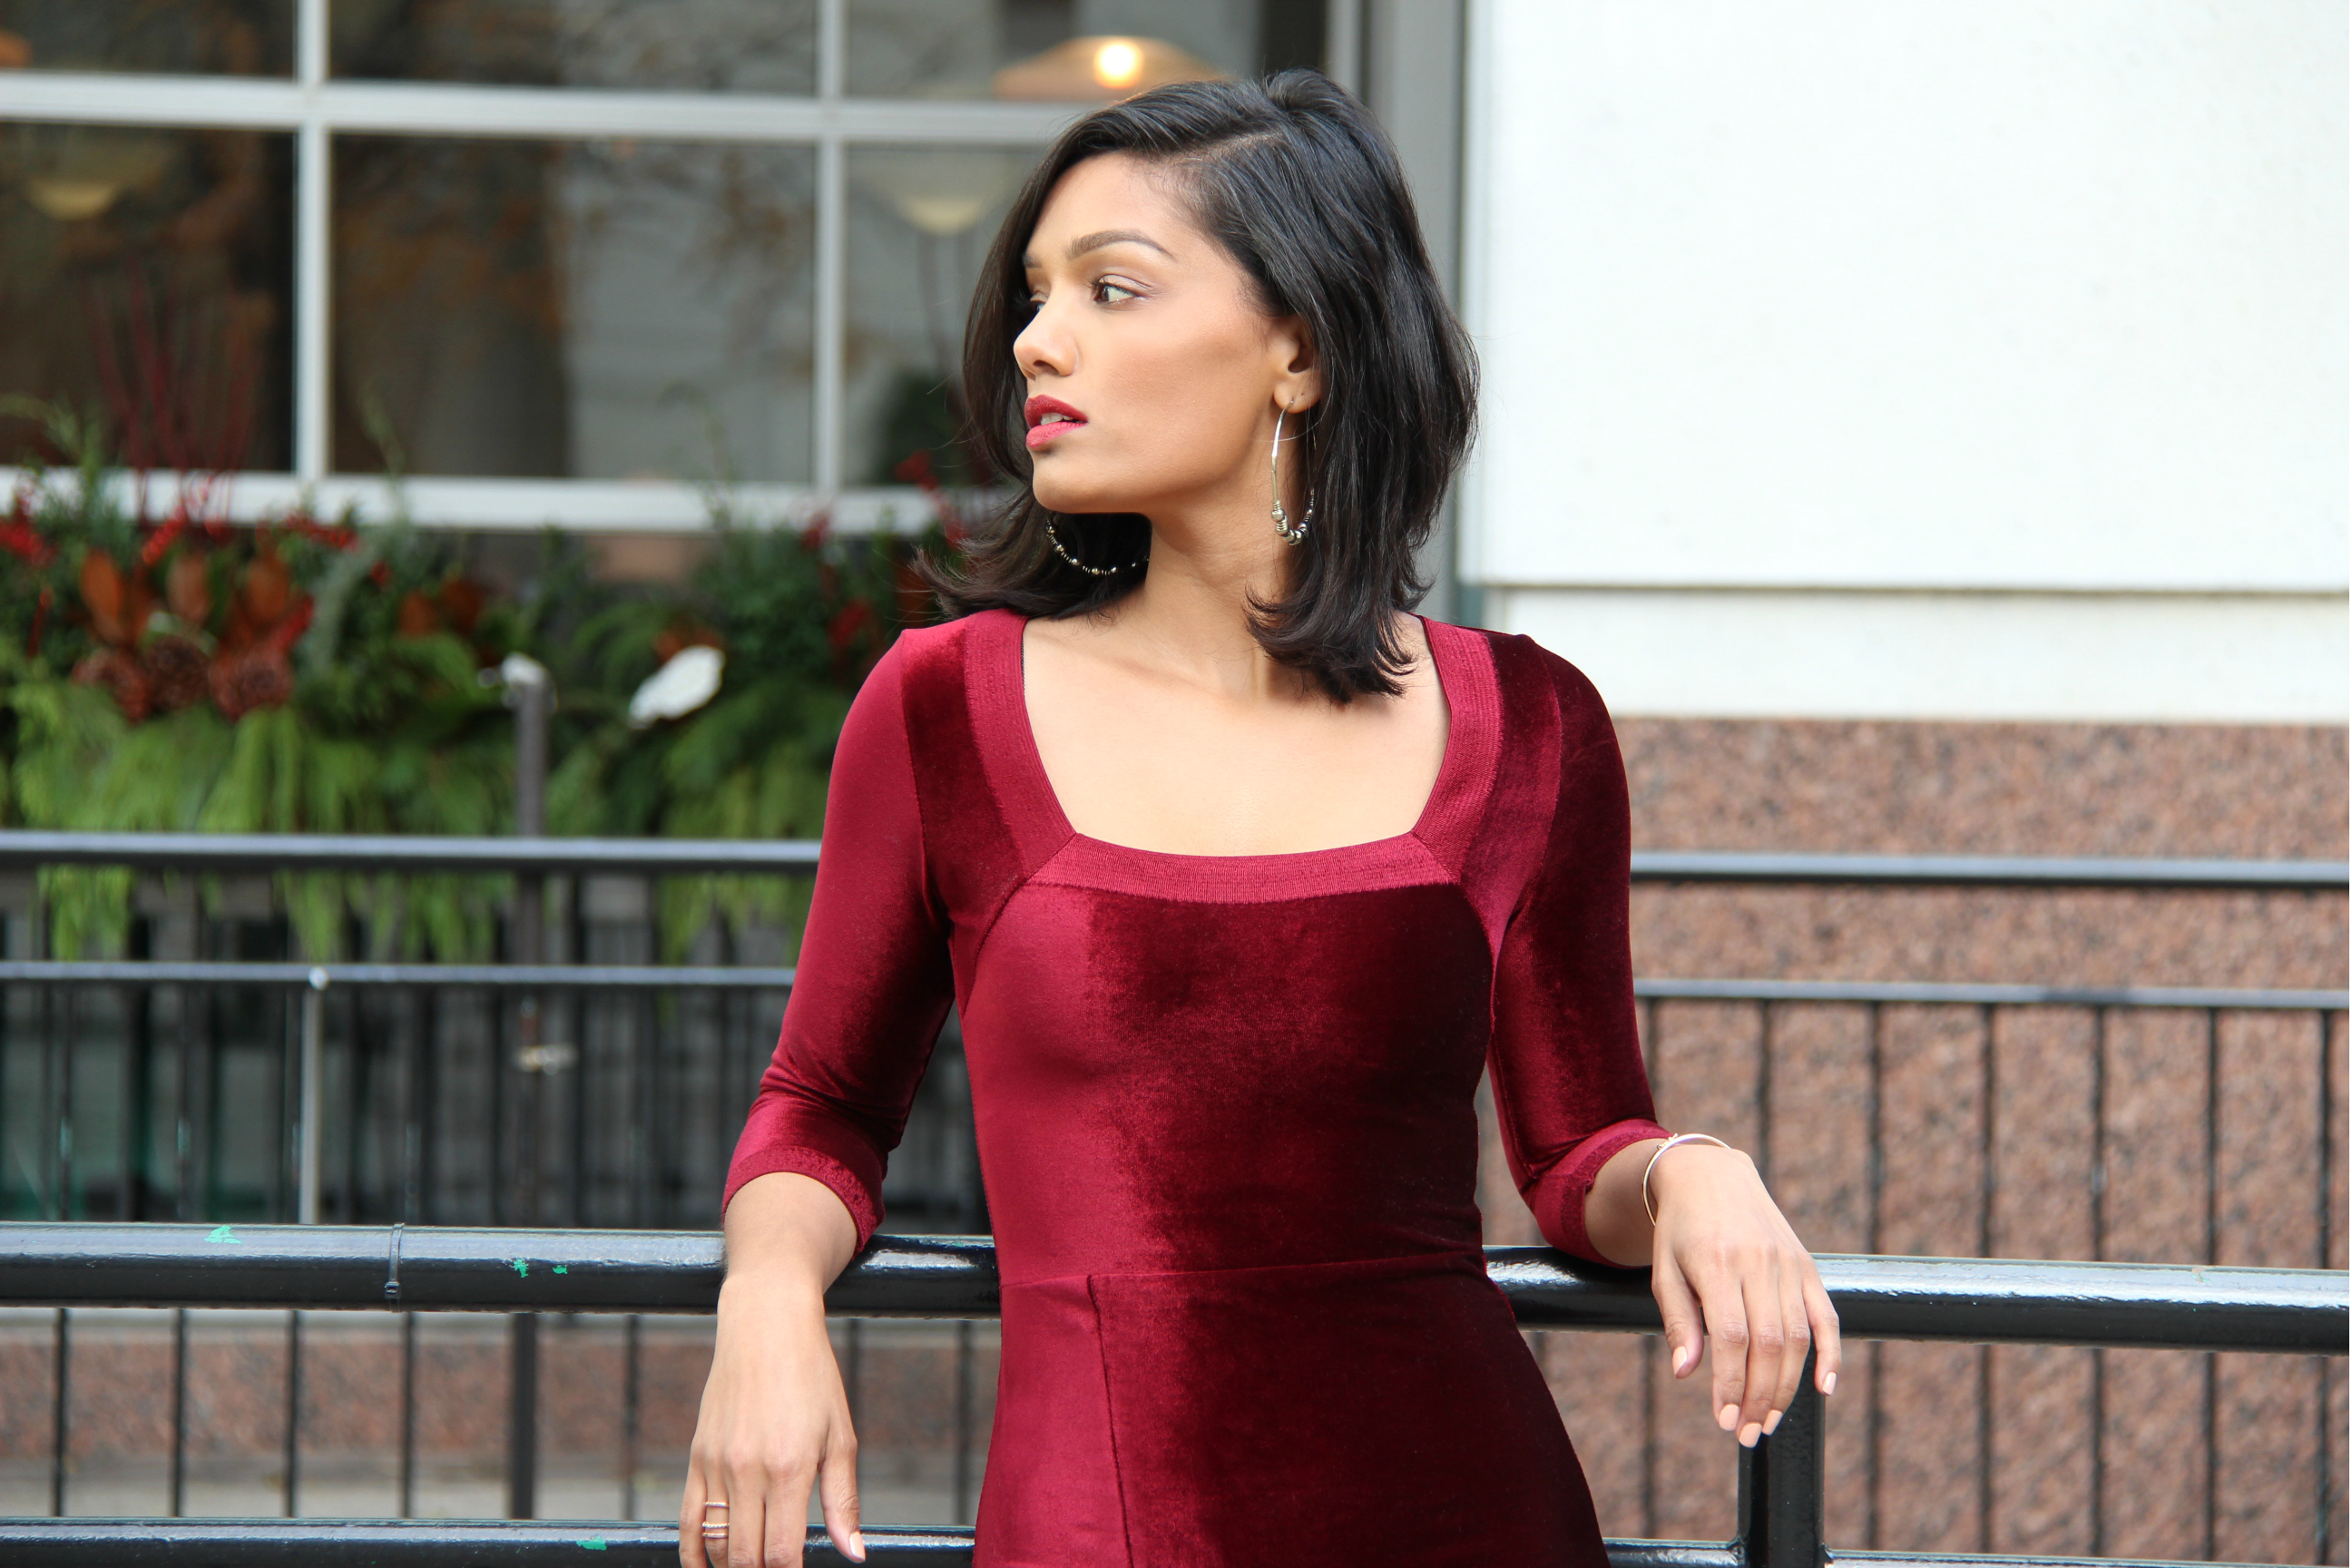
Because the material’s raw edge had a really nice border, I wanted to incorporate it into the design in place of the hem (I was also being a bit lazy because I didn’t want to sew a hem…!)
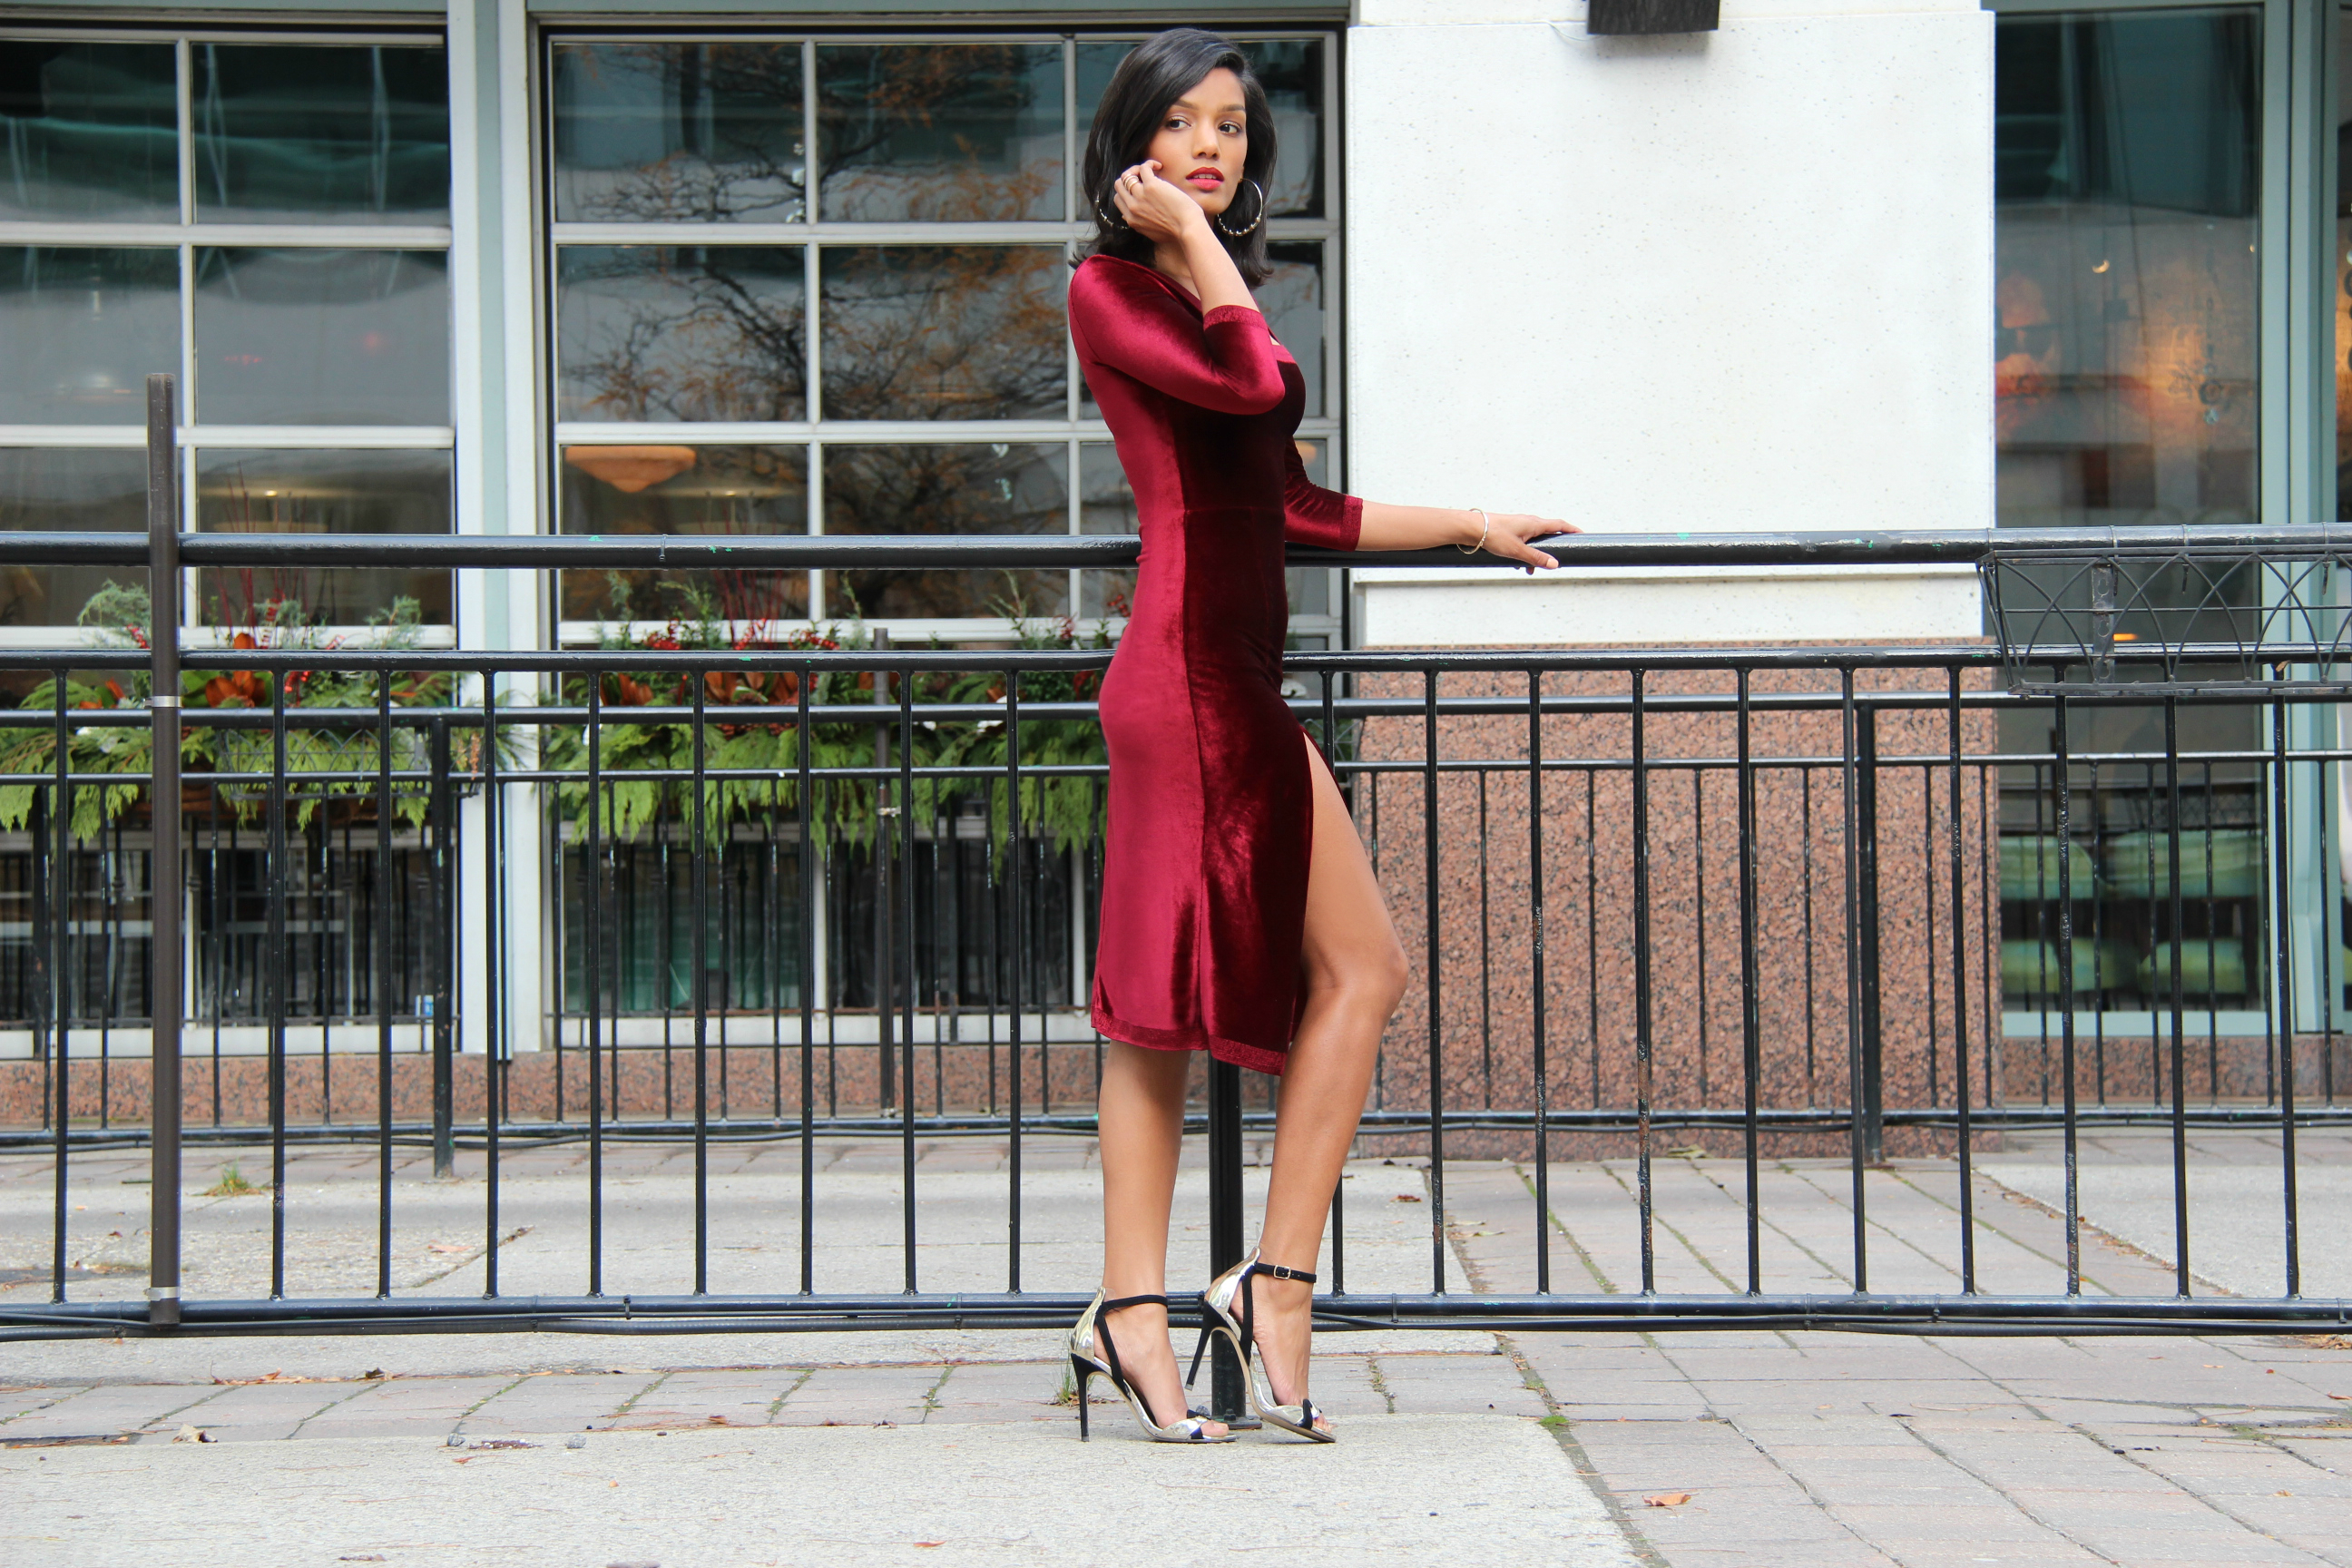
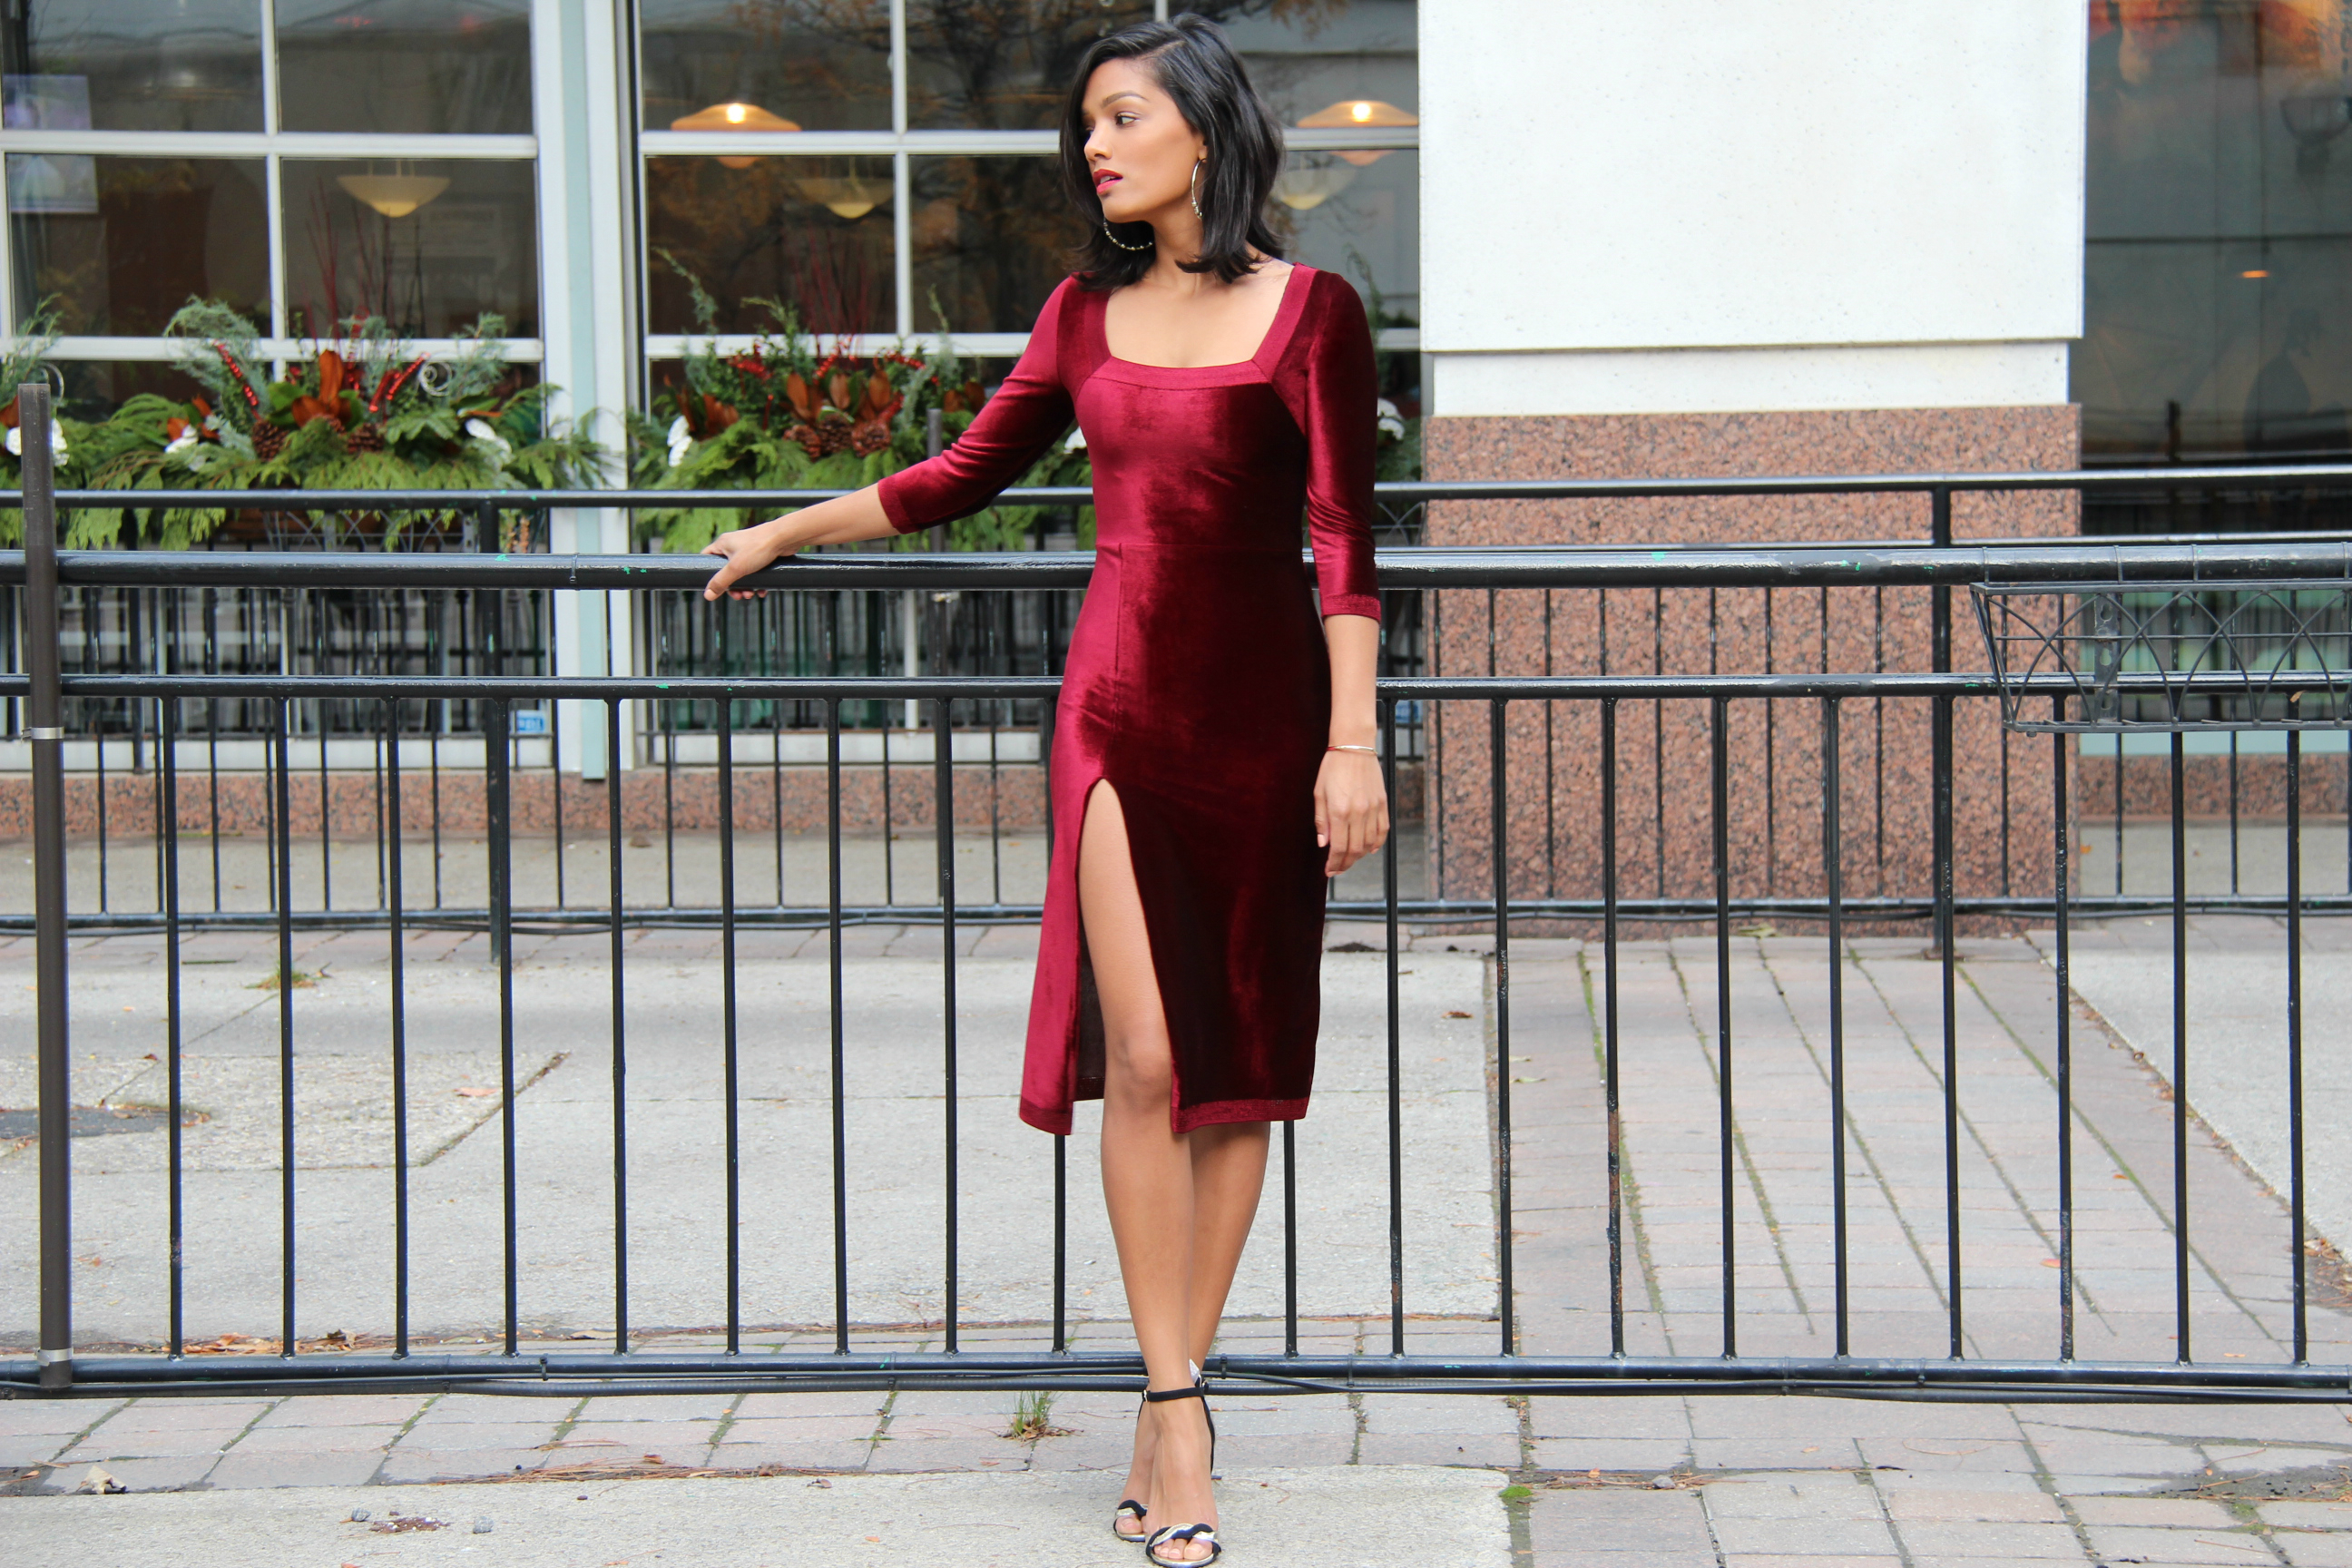
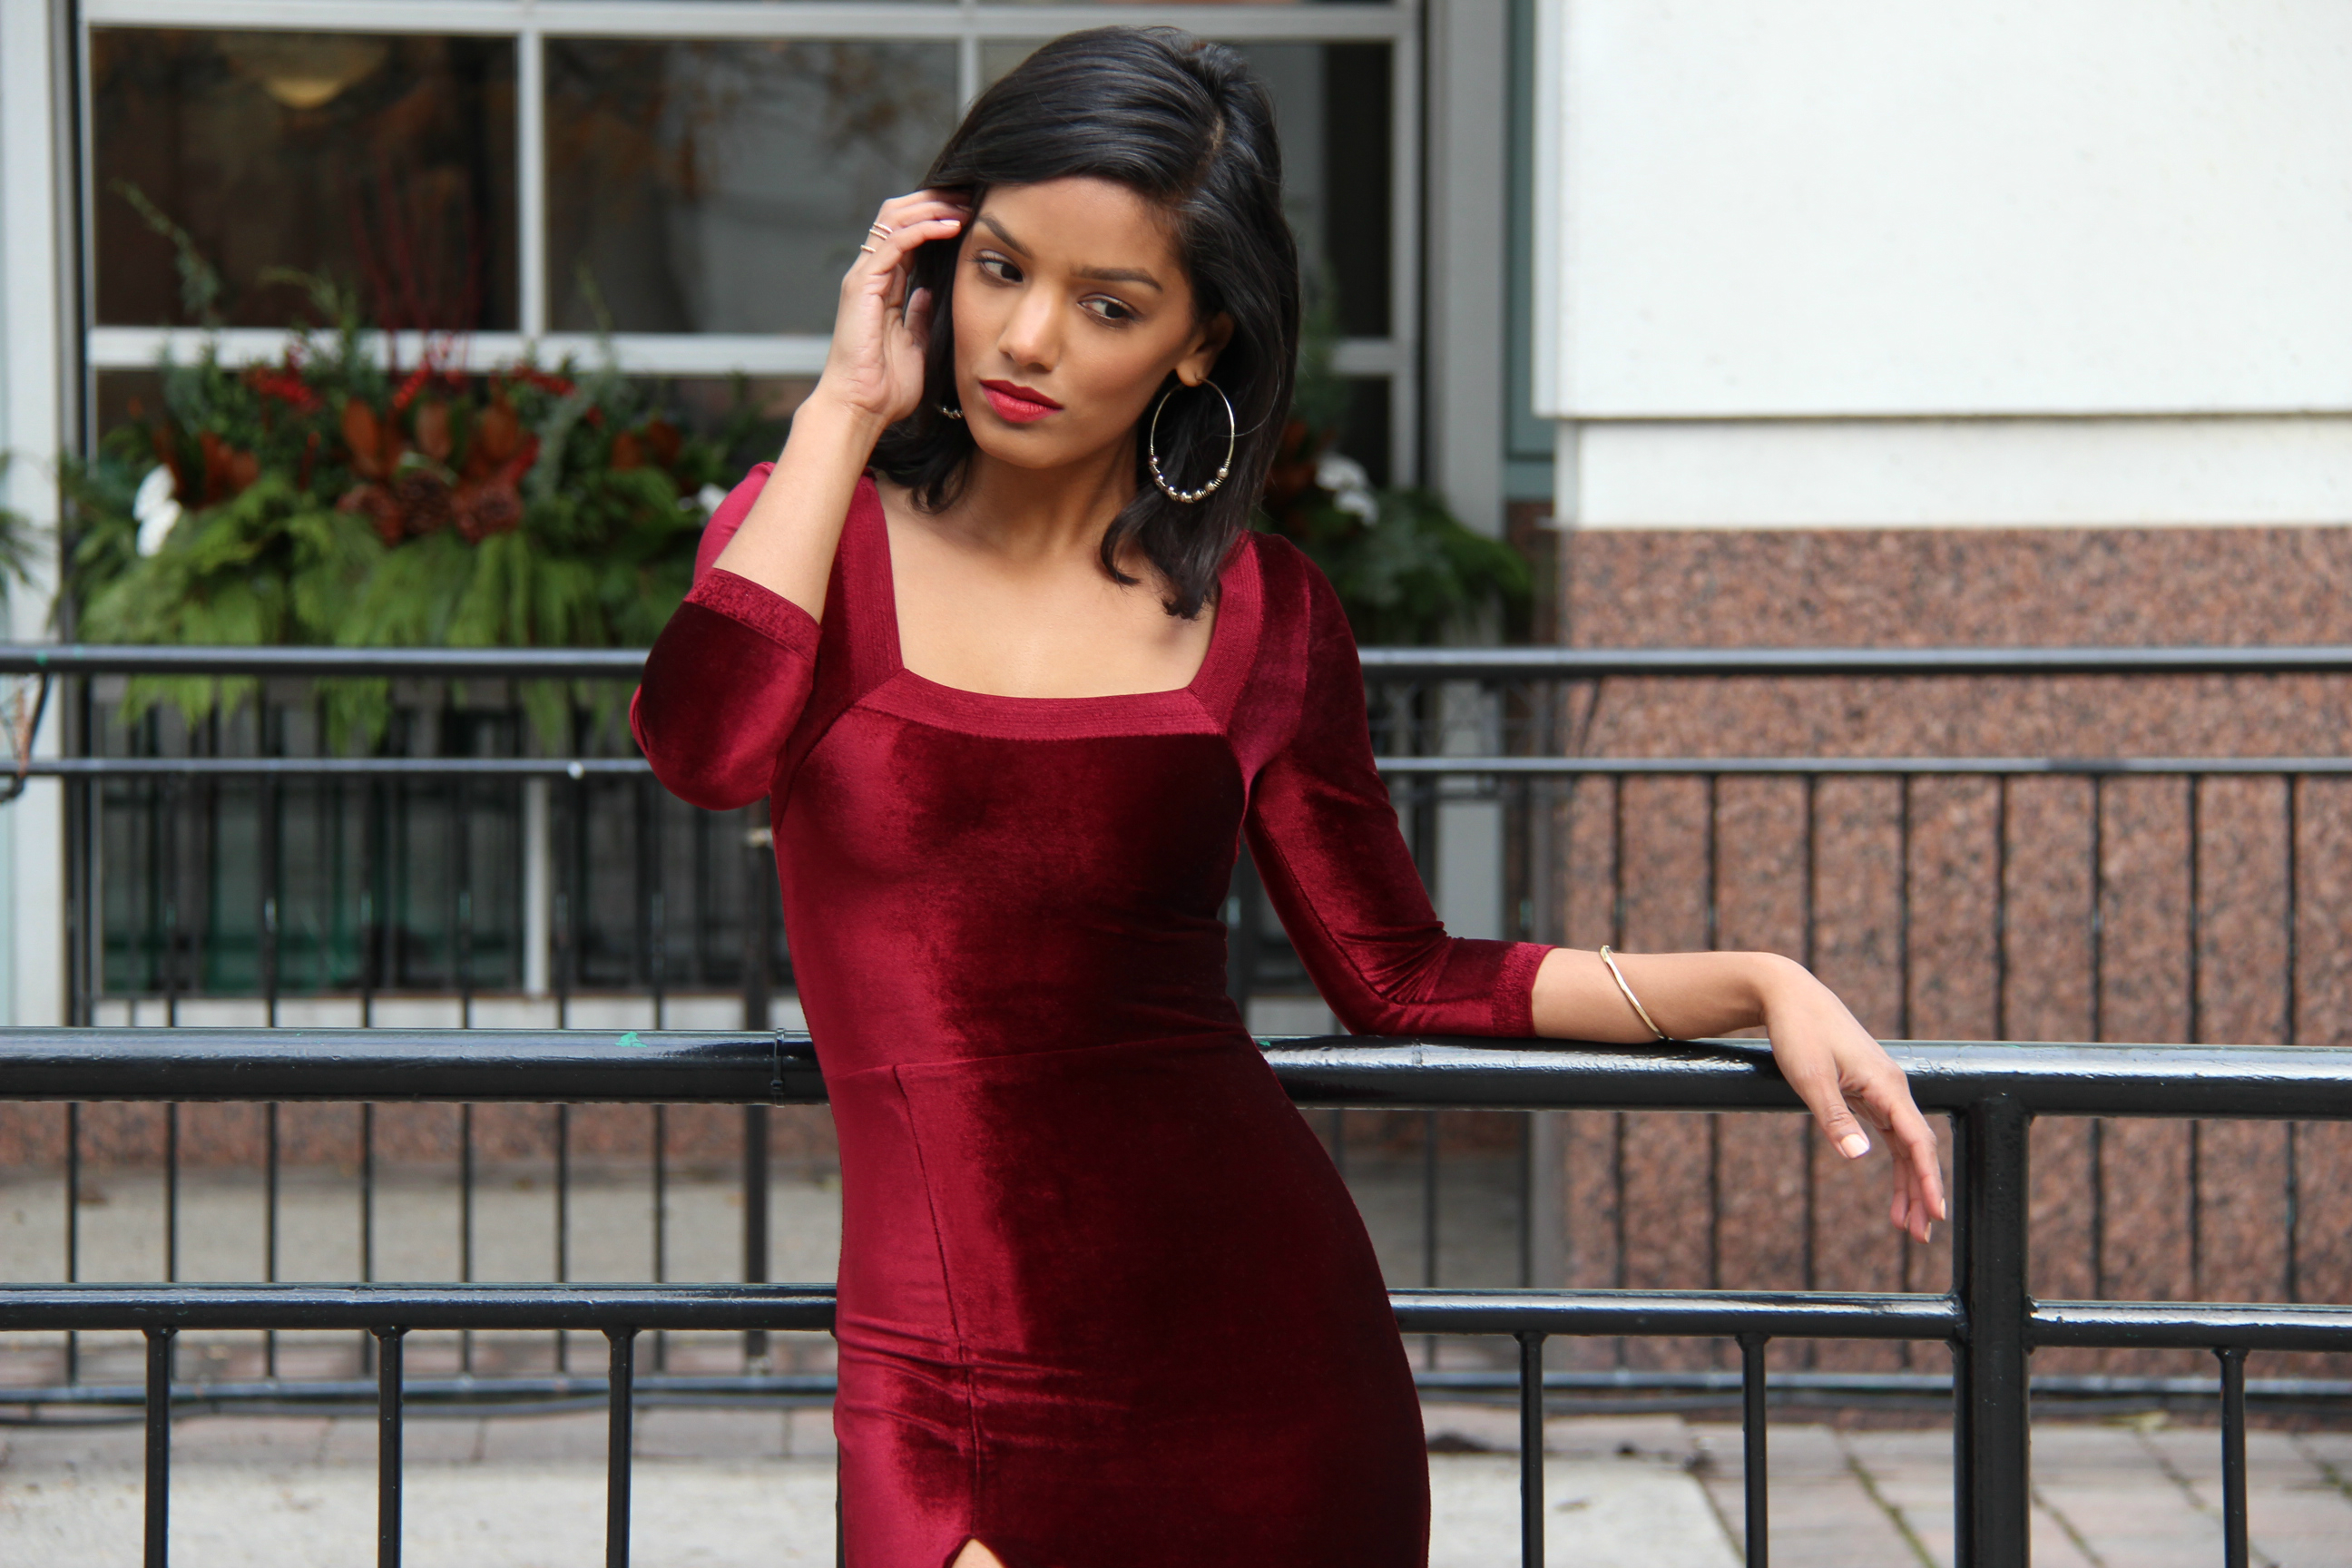
I wanted a square neckline to begin with, but turns out it was necessary to have in order to maintain the raw edge. I spent a lot of time re-drafting my fitted dress sloper to include a square neckline and make sure the sizing was correct. This was definitely a “measure twice ten times, cut once” scenario because I refused to have to re-do anything!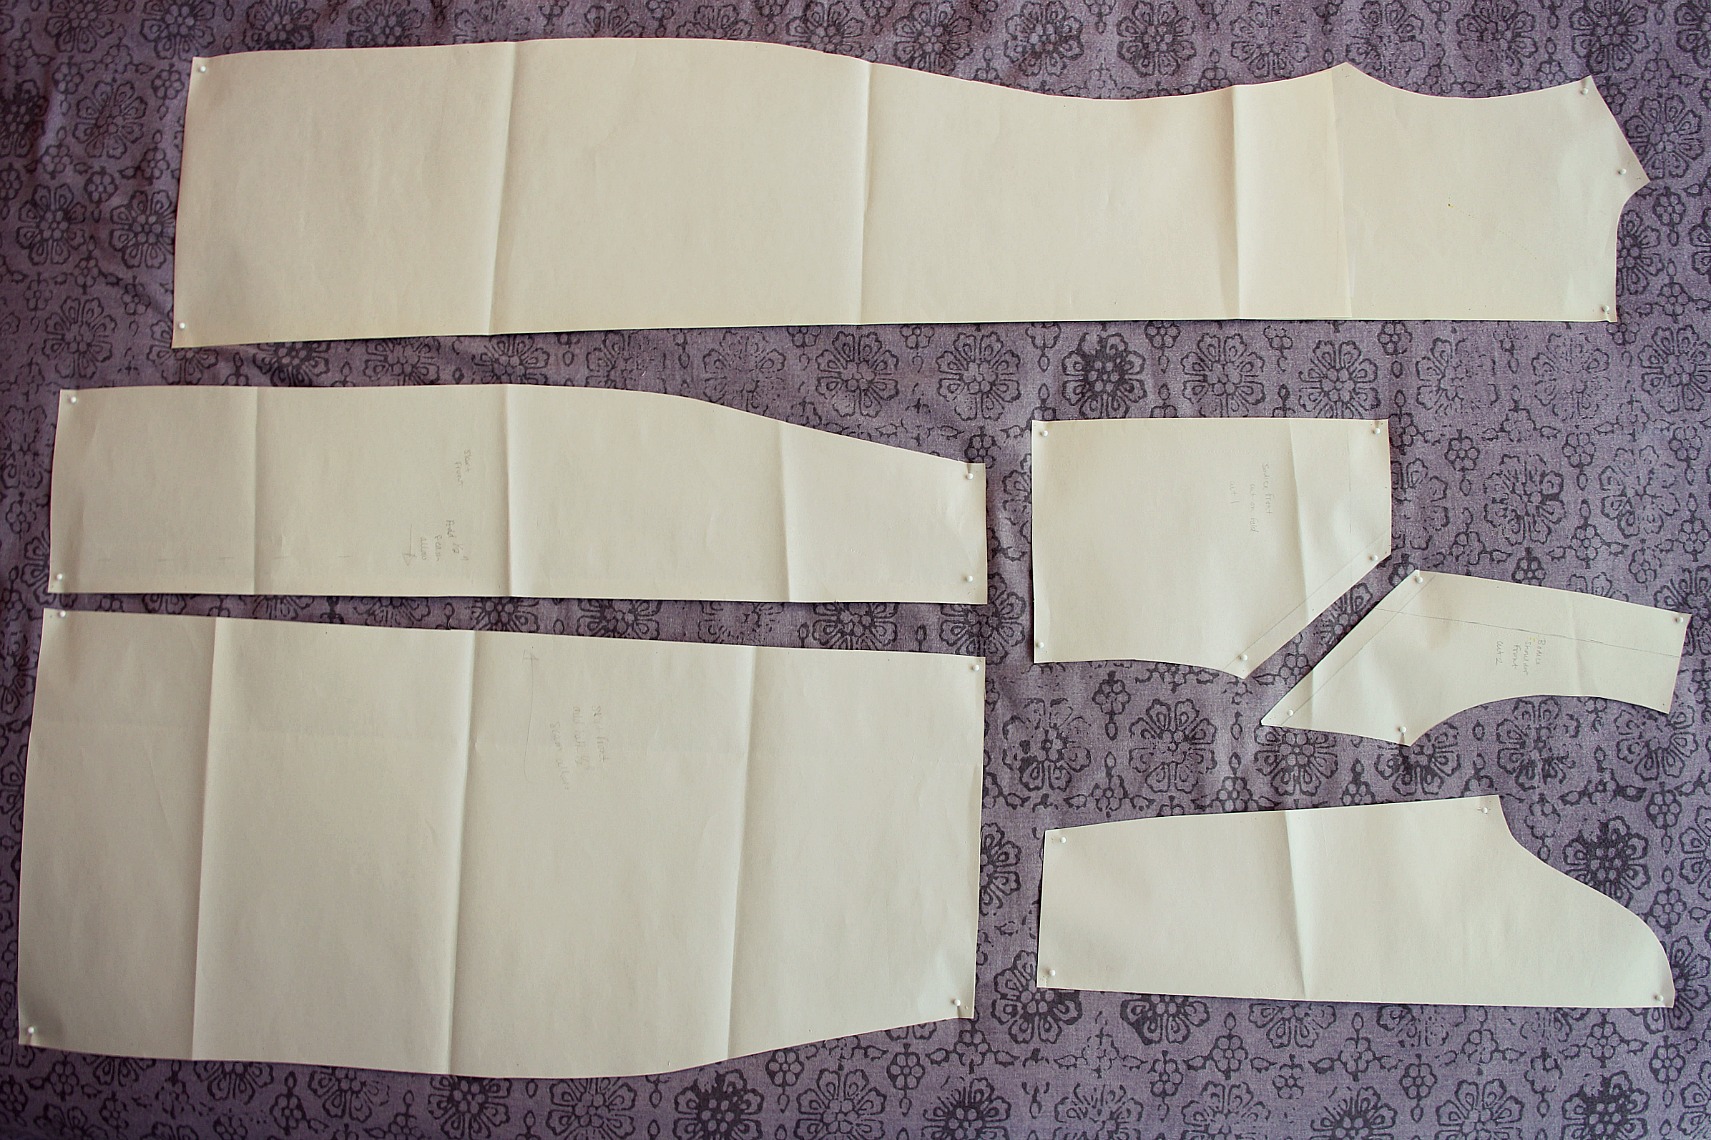
I loved the idea of a thigh high slit – I thought it would make the dress stand out. But because I went for such a high slit, I wanted to ensure elegance by keeping the length just below the knee and the arms 3/4 length.
Working with Velvet
This was my first time working with velvet (stretch velvet to be exact) and I was surprised it wasn’t as easy as I thought it’d be. The edges of the each piece would always curl so it became next to impossible to line them up together. Even when I had pinned the pieces together, it wouldn’t run through the machine evenly. I decided to starched the hell out of the edges to stiffen it, which ended up working out really well. Once the dress was done, I gave it a quick hand wash to remove the starch and soften the fabric.
Final Thoughts
I love love love this dress. I’m so happy with how it turned out. I think it looks classic, elegant and sexy all at the same time. I’d say I can’t wait to wear it again (which is all kinds of true), but really, I just want to make it in bunch of other colours…so maybe this dress has to take a back seat in the closet for now. Guess that’s what happens when you can design your own wardrobe!

Shoes: Top Shop
Material: 1.5m stretch velvet from Fabric By Designers
Photos by: Dushan Tharmal
DIY Red Velvet Holiday Dress


28 Comments
YOWZA.
*picks jaw up off floor, resumes breathing*
i once glued the seams of stretch velvet together before sewing, that damn curl was so annoying! starch would have been better :).
GURL WHAAAAAAT? did it work??? I would be way too paranoid to use glue!!
Looking wonderful!
Thank you so much!!
Oh my gosh. It’s beautiful.. No beautiful is not the word. I love the selvage detail…wowwwwwww!!!!
Yes! The selvage ends are my favourite part of the entire dress! I’m so happy you like it!
Stunning! The ideal holiday dress.
Thank you!
SO amazing! Love it. I’ve been craving velvet all fall – I’ve got some to sew for my little nieces, but I admit I’ve pet the fabric and pictured it for myself!
BTW, not sure if you know that there is a facebook group for Toronto Sewcialists (https://www.facebook.com/groups/194887417342225/) and we’re having a get-together this weekend! So, you know, if you are bored and want to meet some strangers who also love sewing, come along! 😉 I’m Gillian, and I blog at craftingarainbow.wordpress.com – I can’t remember how I found your blog lately, but it stuck out because you are local!
Hi Gillian! Thanks for this! I didn’t know about it, but I just joined – it’s great because I don’t know to many sewists here myself, so it’ll be good to connect. Thanks for sharing! And yes! the feel of good quality fabric…it can be too luxurious to pass off sometimes lol!
So gorgeous. Thanks for showing the pattern pieces too.
Thank you! My pleasure, thought it was important to show how I broke down the neckline. Glad you appreciate it!
I *just* finished a velvet skirt and then saw this and wished I made something more sassy! It’s beautiful!
Aw thanks!! I’m sure yours looks great – I just checked out your bloglovin and didn’t see it – you’ll have to post it up soon!
A perfect red dress. You made it looked so easy and effortless. Wonderful and classy every time.Very proud of your talent.
Thanks mom! See how well your skills have passed on? 😀
everything. that’s what this is.
all. of. the. things!
lol! thank you! I really appreciate the love! 😀
That neckline is perfection! Did you do a practice run in cheaper fabric, or nail it the first time? Also, what was your cutting layout like?
(If you don’t recall, it’s fine.. I’m wondering if you managed to get everything running the same direction.)
Eep! I did not do a practise run. I usually dont…but I really should lol. Regarding the cutting layout, because I wanted every hem to show the fabric border, the sleeves, horizontal portion of the neckline and skirt bottom were cut running in the same direction. The vertical sides to the neckline were not, simply because I wanted the border and to get that, it ended up going in the opposite direction.
hope that helps!
That is an amazing dress and it looks amazing on you. You totally nailed it. I’m so impressed!!!
thank you so much! I really appeciate the kind words!!
Pingback: Weekend Links | Blog | Oliver + S
thank you for writing about my dress in your post! That’s so awesome! thank you for the kind words!!!
That is unbelievable!!
Thank you!
Absolutely gorgeous! And stretch velvet can be horrible to sew with, but non-stretch is actually pretty obedient and goes through the machine really well. Both leave lots of fluff to clean up, though!
thank you! I agree completely – I was pretty caught off guard by the difficulty I had with stretch velvet…AND the amount I had to clean up afterward!! lol!